Quick Setup Guide
Use the Gravity mobile app to commission an Avenger, configure its first door and add a user who can unlock it.
Before you begin
Section titled “Before you begin”Make sure that:
- The Avenger is powered on.
- You are close enough to the Avenger to connect over Bluetooth.
- Bluetooth is enabled on your phone.
- You know the name and password of the Wi-Fi network the Avenger will use.
- You are signed in to the Gravity mobile app with an account that can commission Avenger devices.
- The door hardware is installed and you know which reader and relay are connected to it.
- You have a PIN or card ready for the first access user.
Commission the device
Section titled “Commission the device”1. Start commissioning
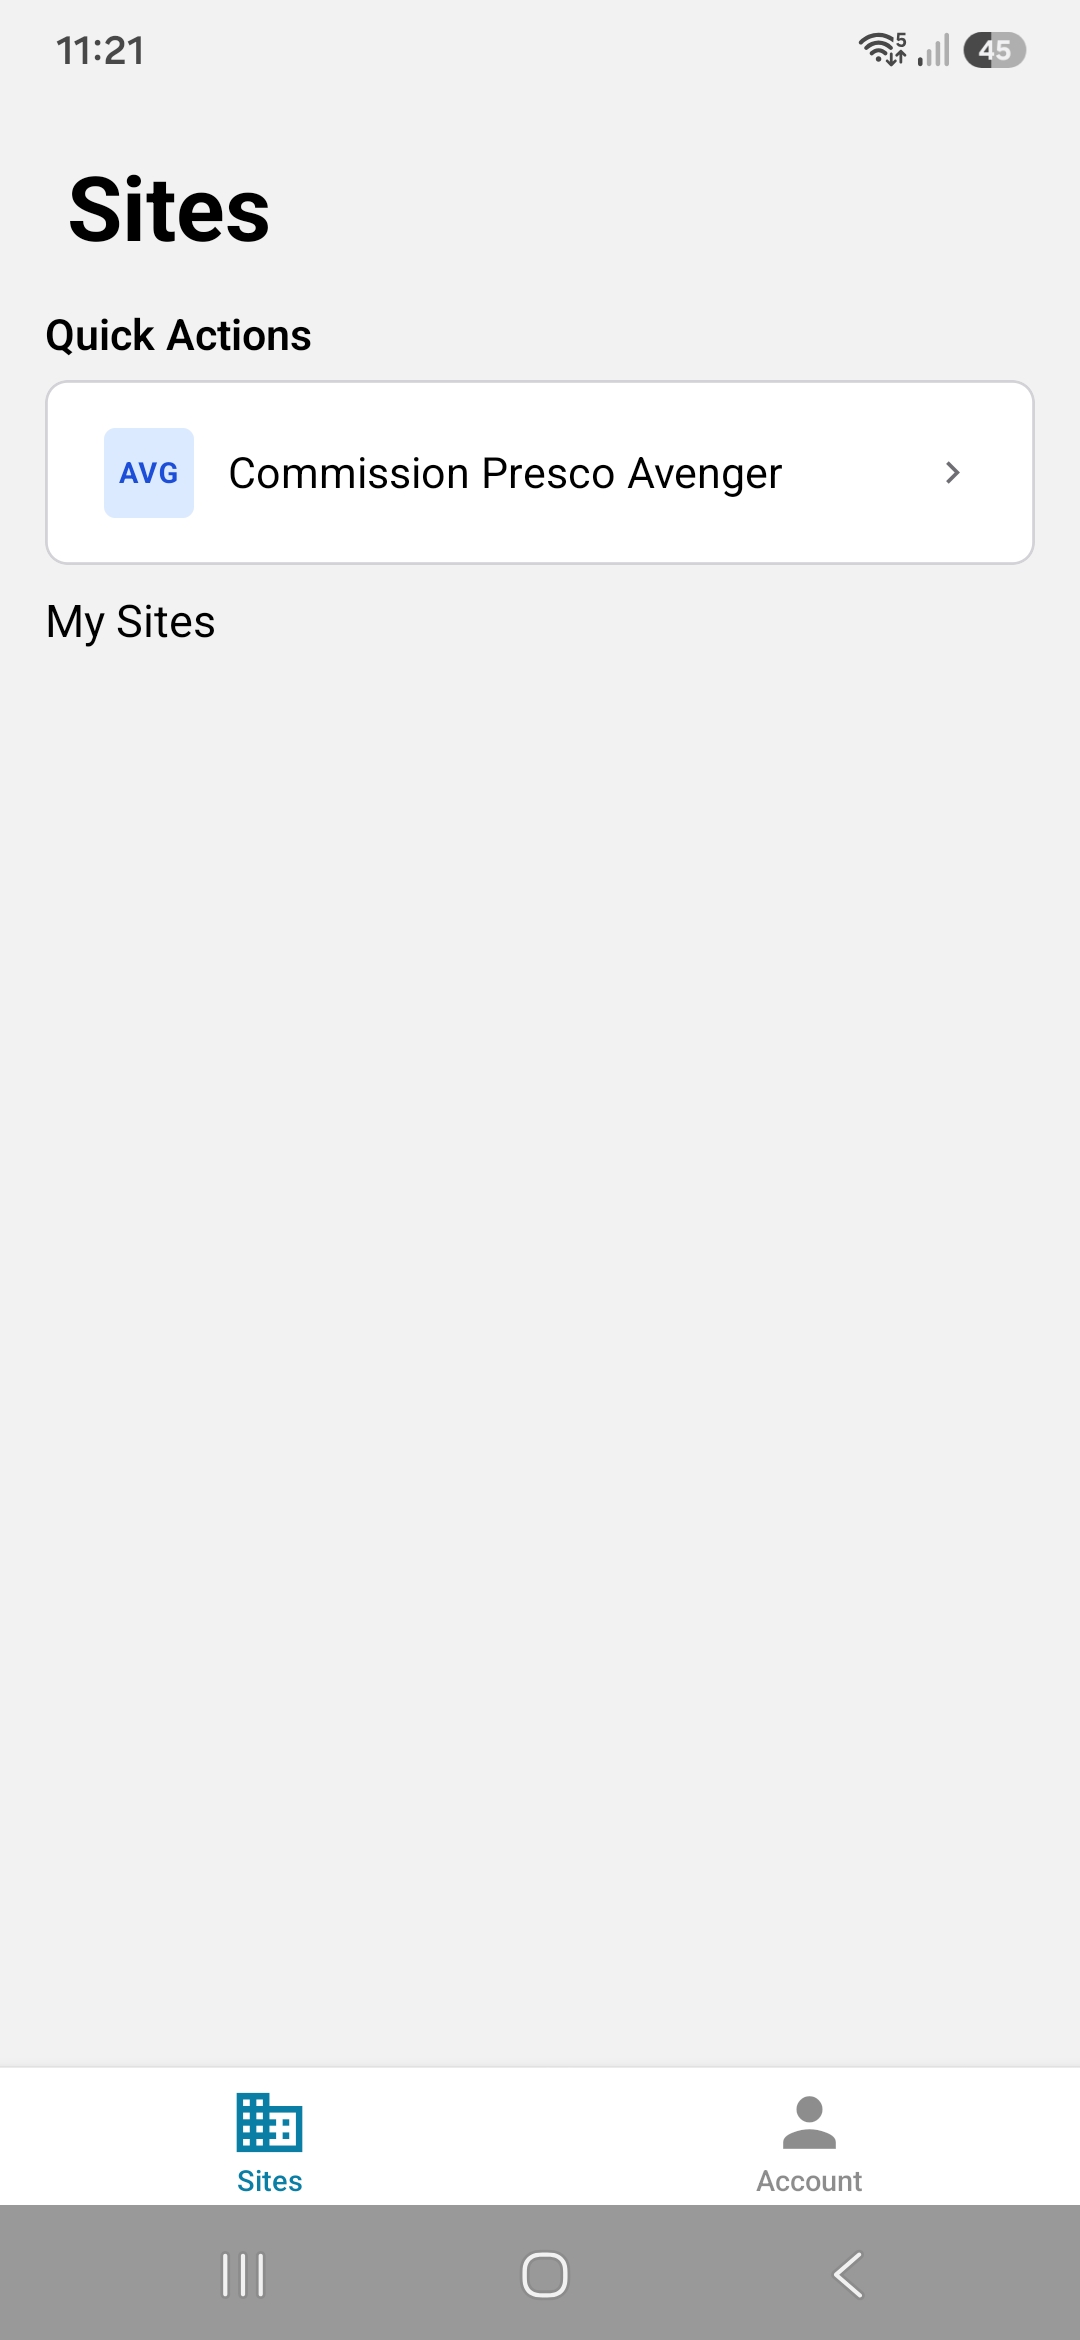
Section titled “1. Start commissioning”From Sites, find Quick Actions and select Commission Presco Avenger.
Allow the requested Bluetooth permissions. The app begins scanning for nearby Avenger devices automatically.
2. Connect to the Avenger
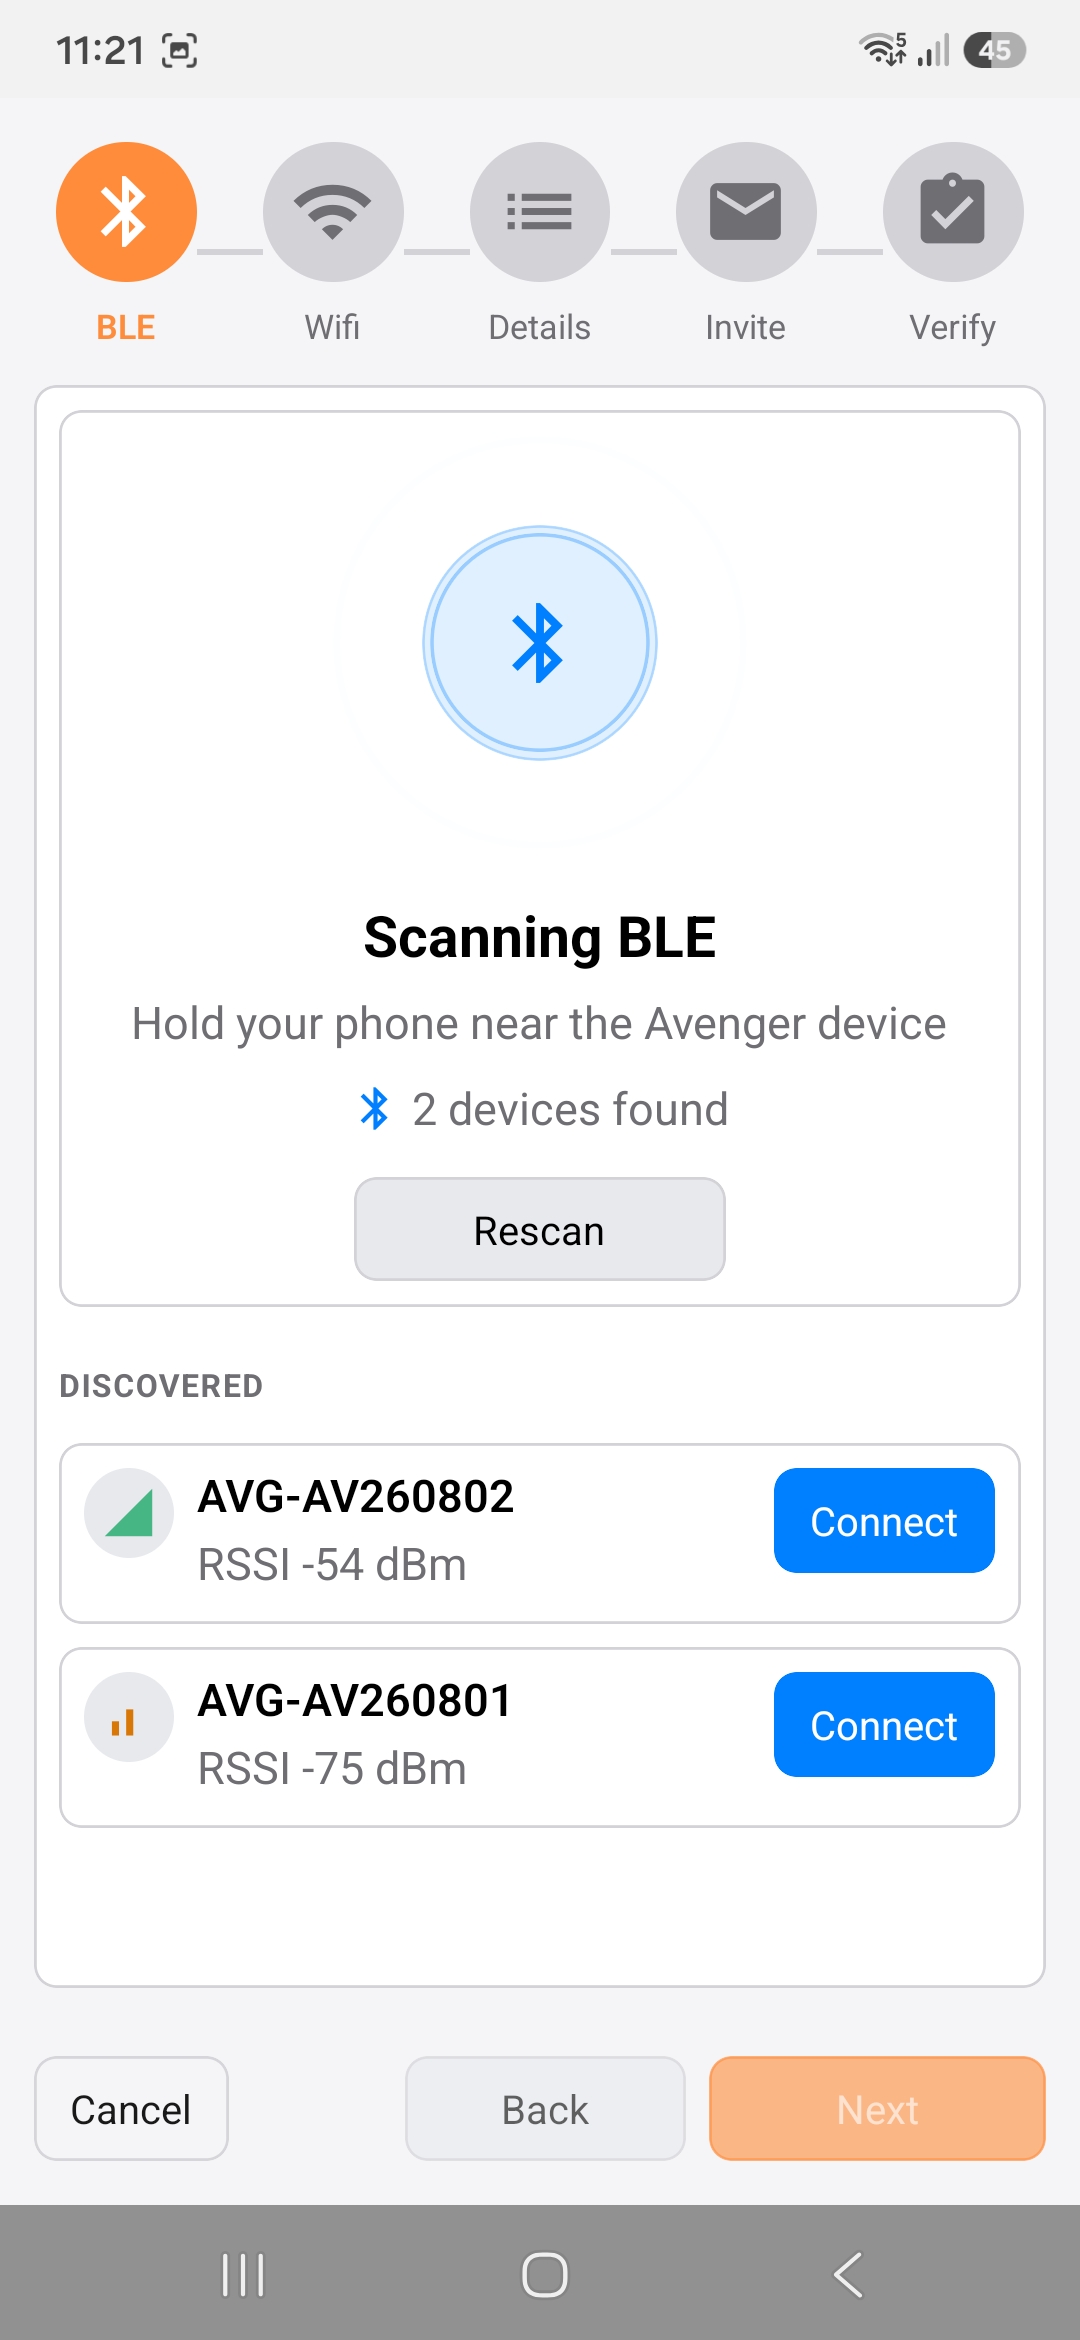
Section titled “2. Connect to the Avenger”Select Connect beside the device whose serial number matches the label on the Avenger.
After the Bluetooth connection succeeds, the app moves to Wi-Fi configuration.
3. Connect the Avenger to Wi-Fi
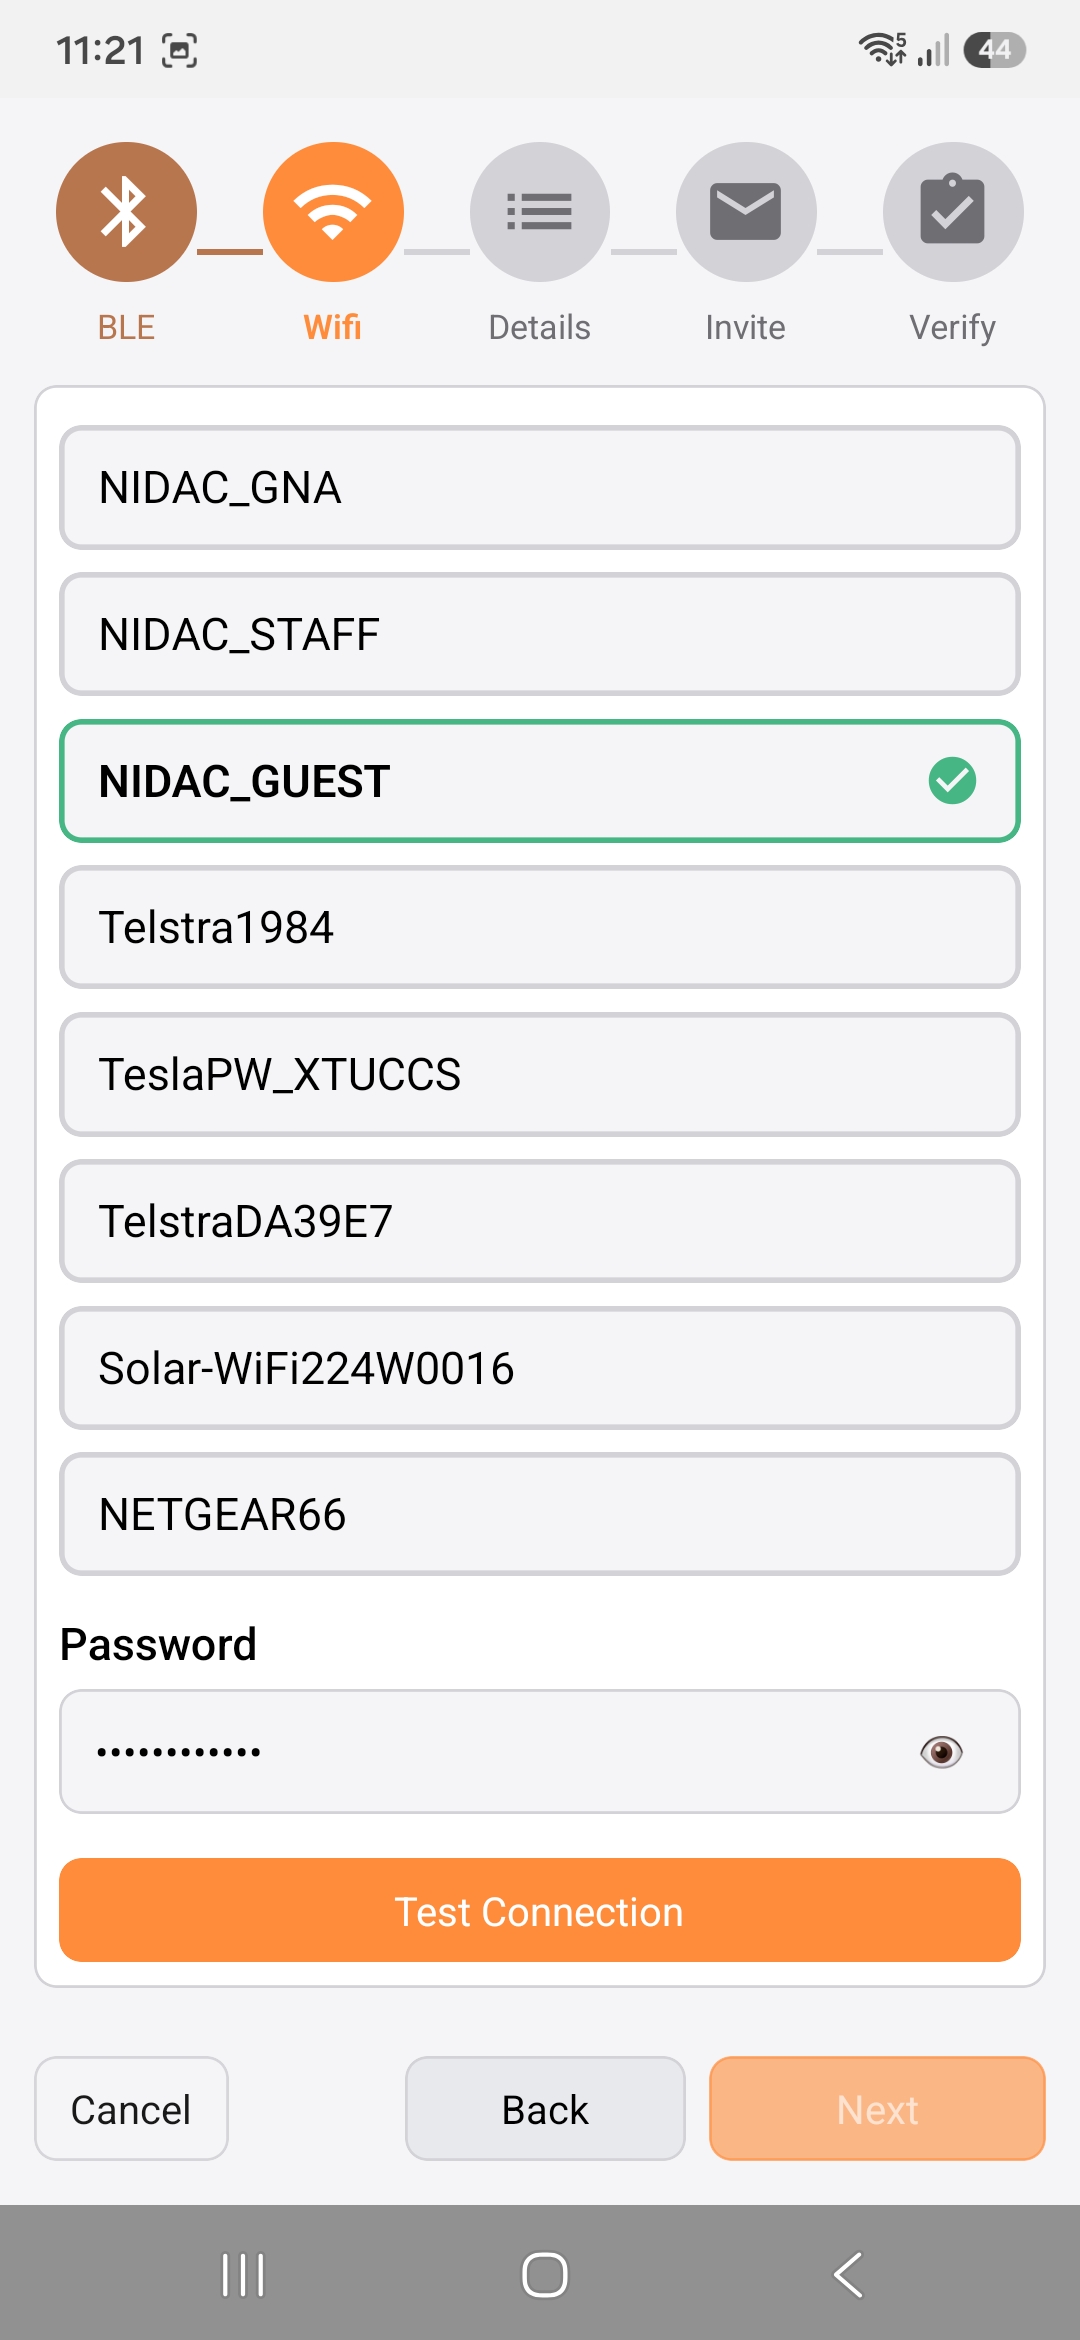
Section titled “3. Connect the Avenger to Wi-Fi”Select Scan, then choose the network the Avenger will use.
Enter the Wi-Fi password and select Test Connection. Wait for the app to confirm that the Avenger connected successfully, then select Next.
If the network is not shown, move the Avenger closer to the access point and scan again.
4. Enter the site details
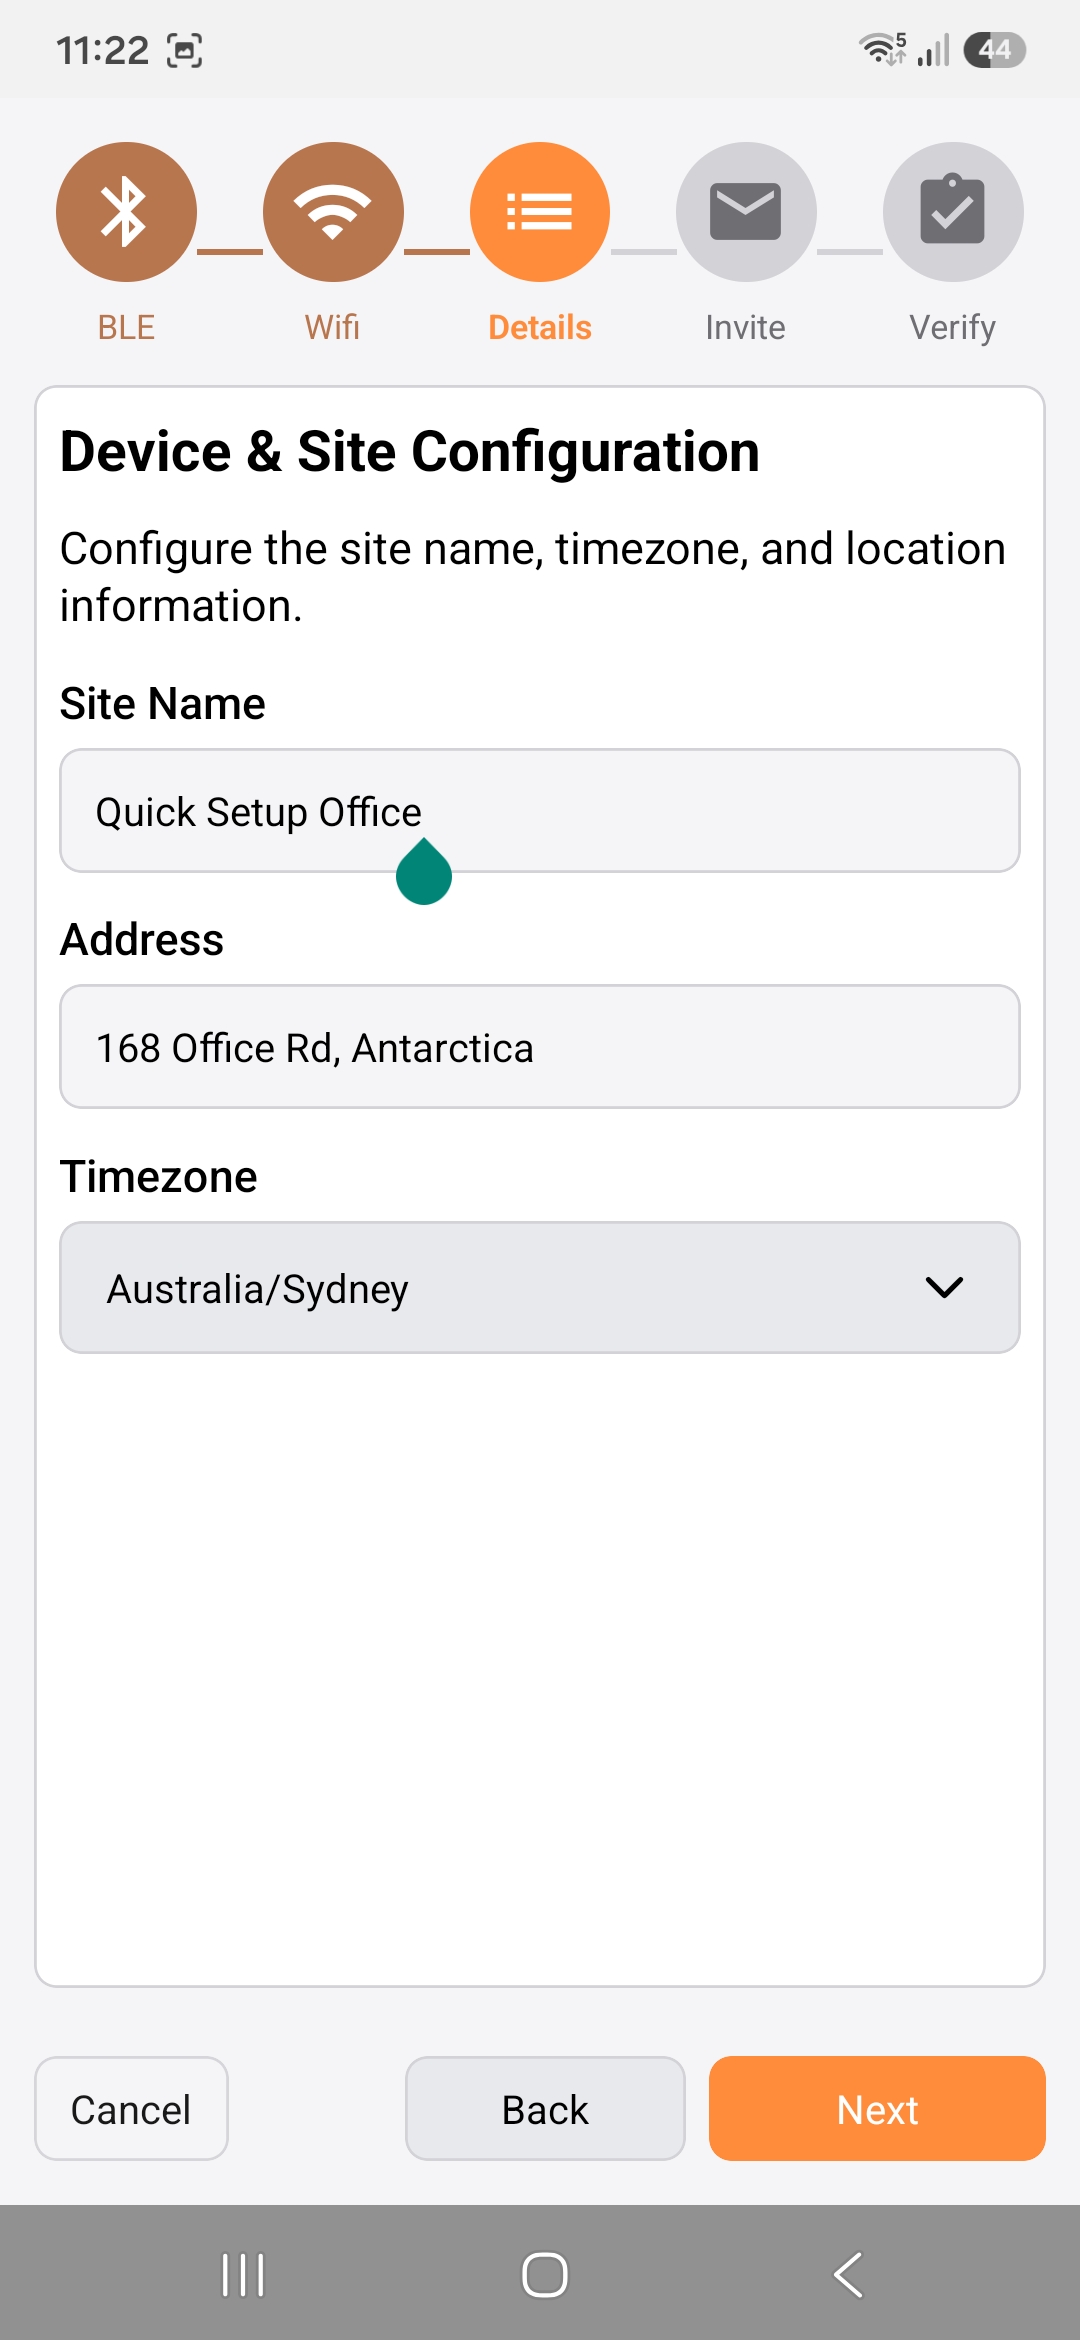
Section titled “4. Enter the site details”Enter a descriptive Site Name, such as the customer or building name.
Add the street address if it is known, then select the site’s Timezone. The site name and timezone are required.
Select Next when the details are correct.
5. Invite site users
Section titled “5. Invite site users”To grant another person access to manage the site, enter their email address and select Add. Repeat this for each person who should have access.
Inviting site users is optional. You can skip this step and manage site access later.
6. Review the setup
Section titled “6. Review the setup”Check the site name, timezone, Wi-Fi network and Avenger serial number.
Select Complete to create the site and finish configuring the device. Do not close the app while setup is in progress.
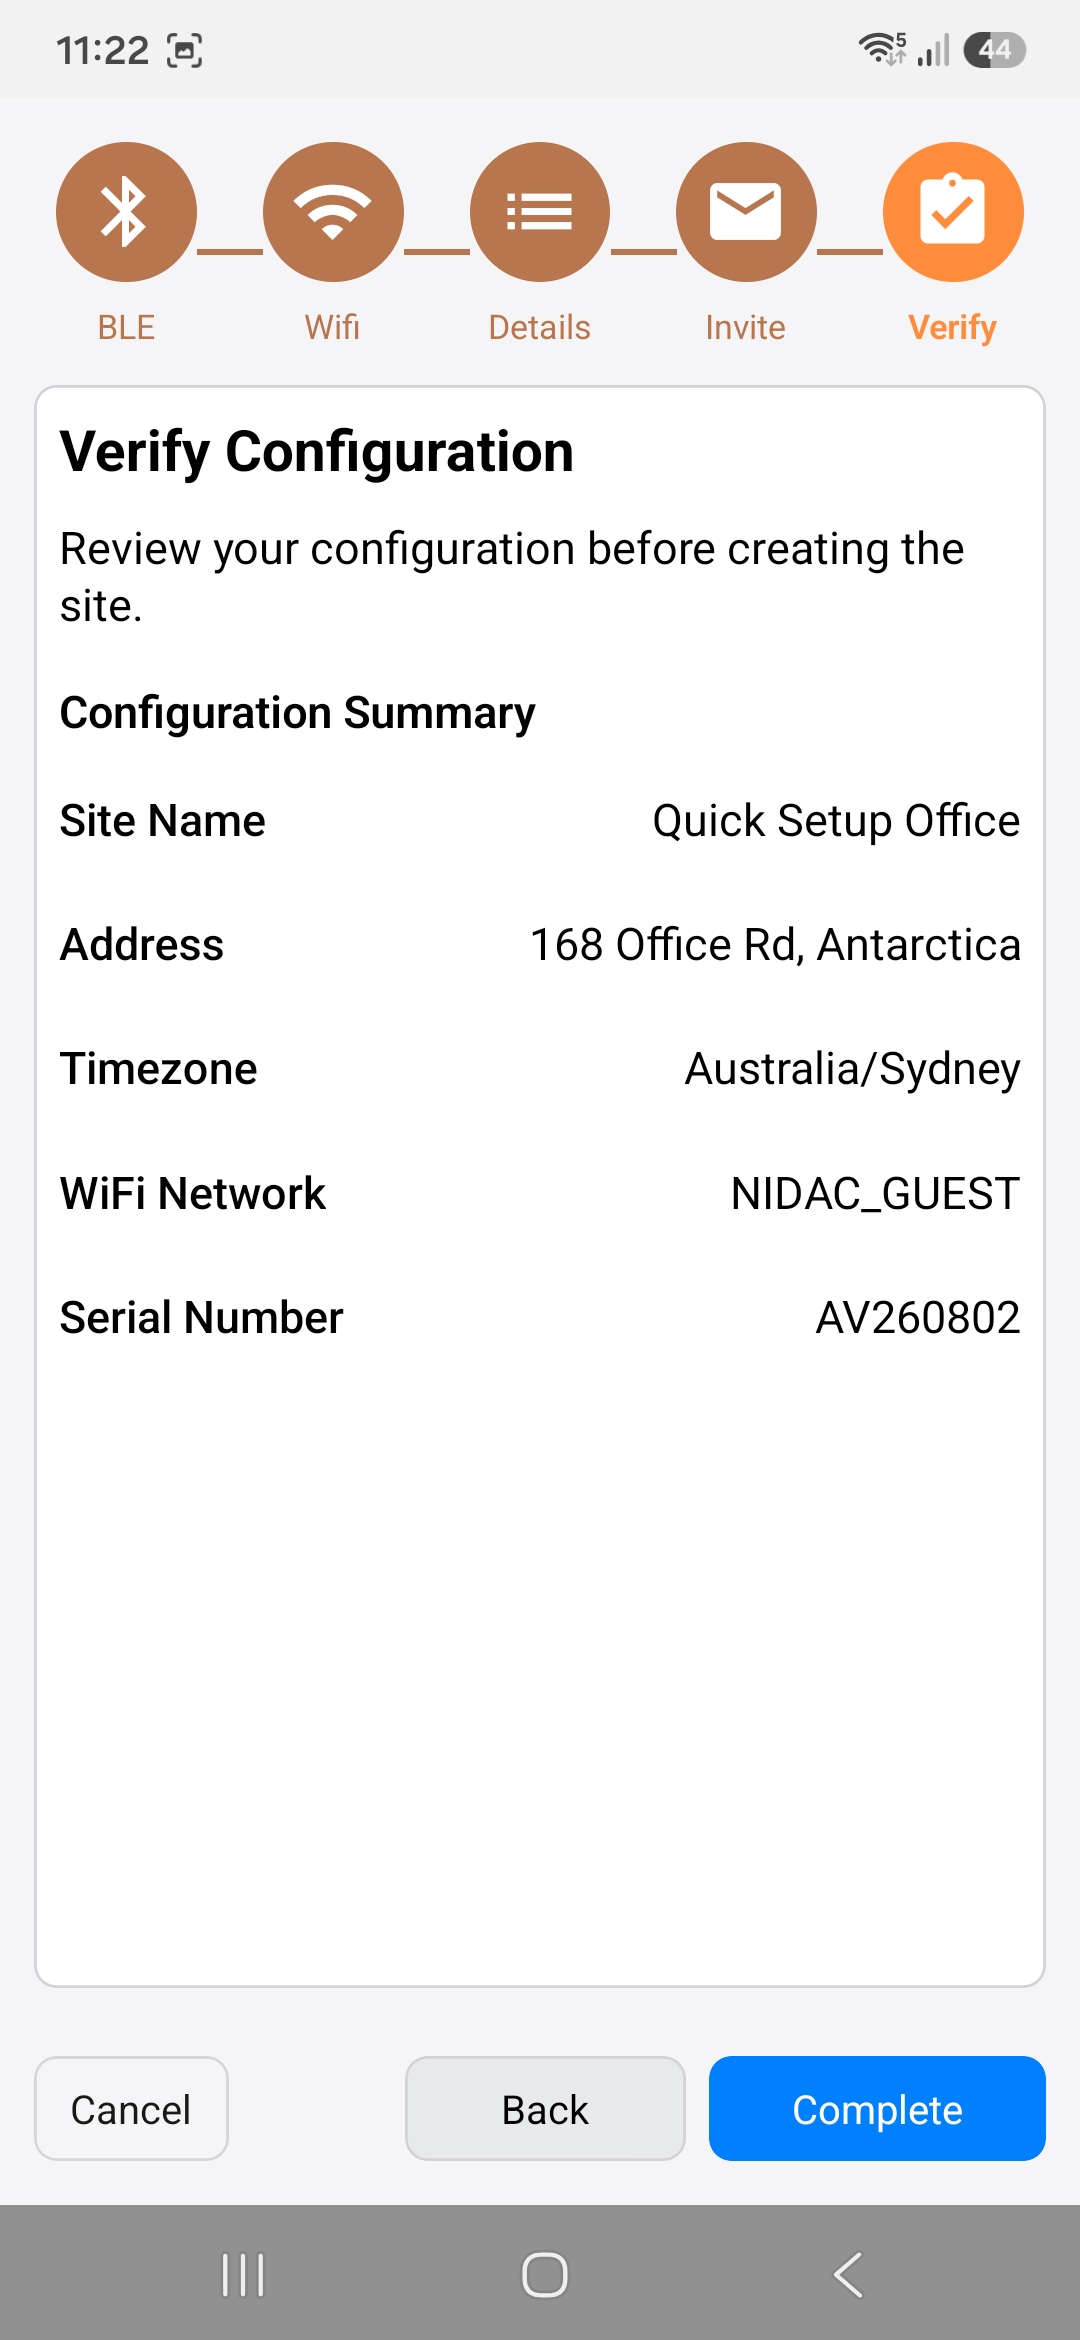
7. Finish commissioning
Section titled “7. Finish commissioning”When Setup Complete appears, select Complete again to open the new site.
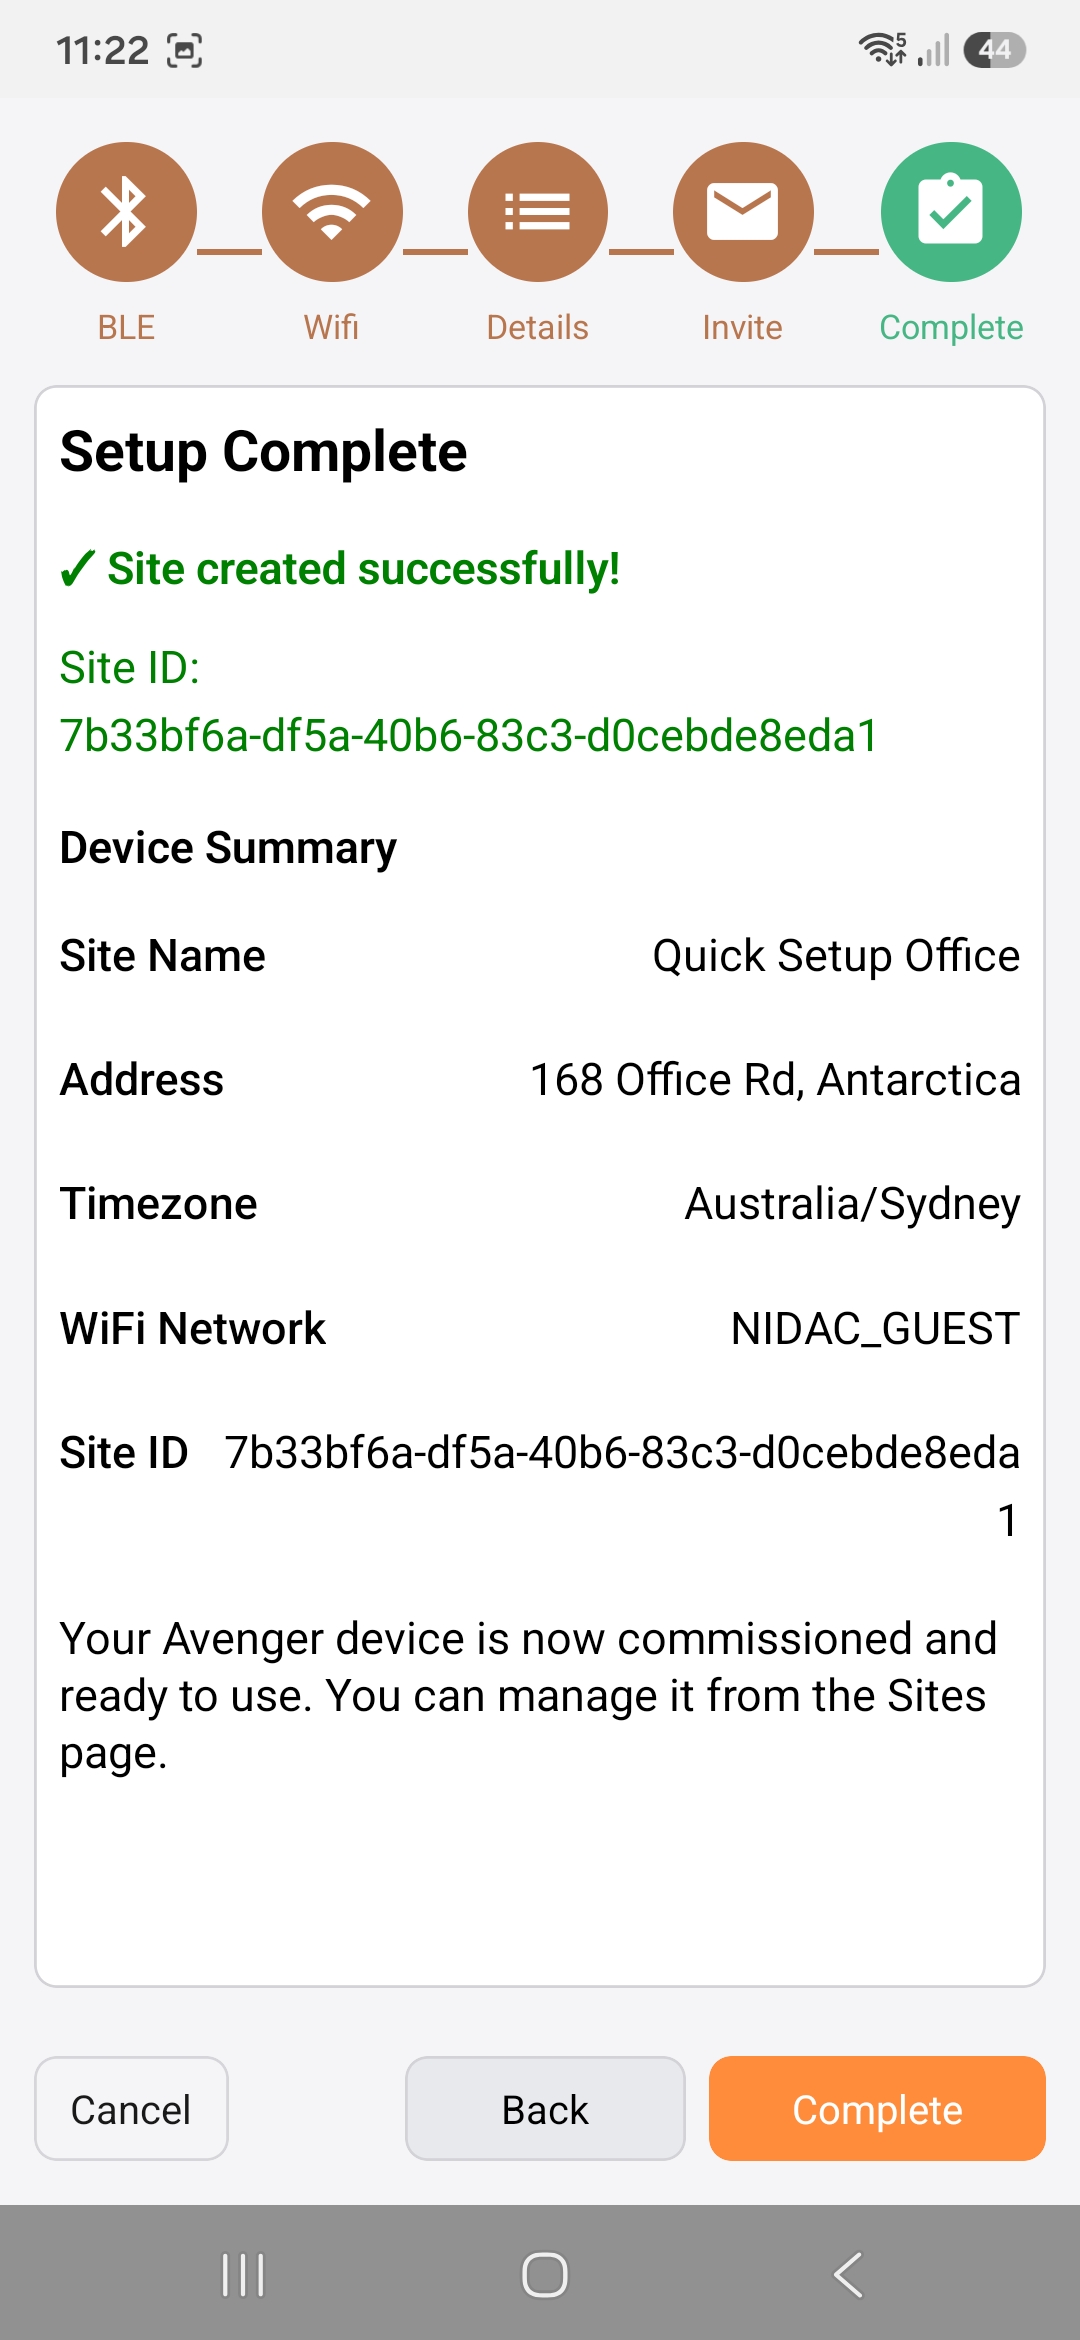
8. Open the new site
Section titled “8. Open the new site”Confirm that the new site appears under My Sites and shows Online, then select it.
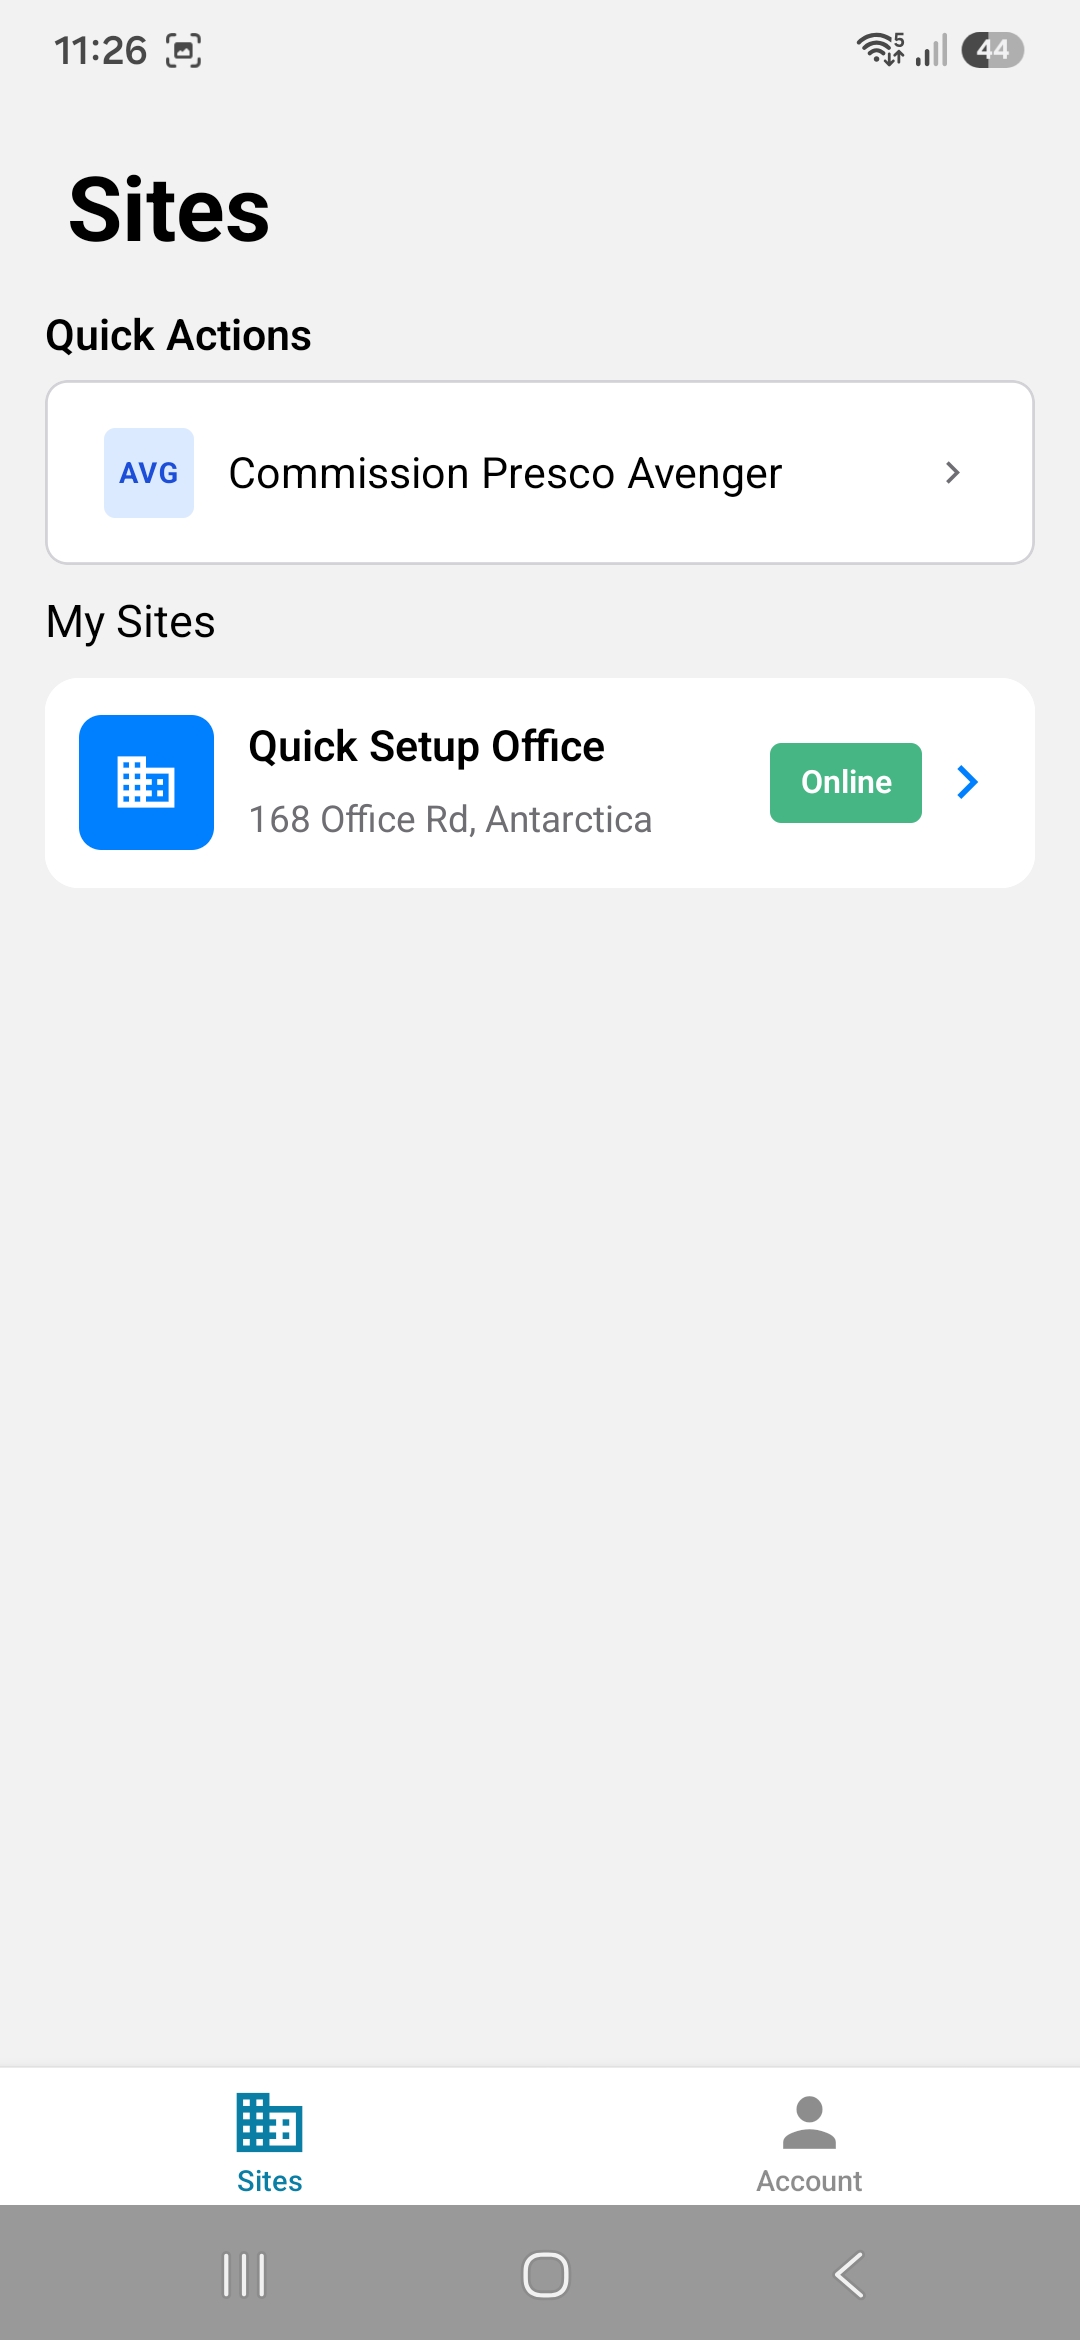
Configure a basic door
Section titled “Configure a basic door”9. Open the first door
Section titled “9. Open the first door”From the new site’s home screen, select Doors, then select Door 1.
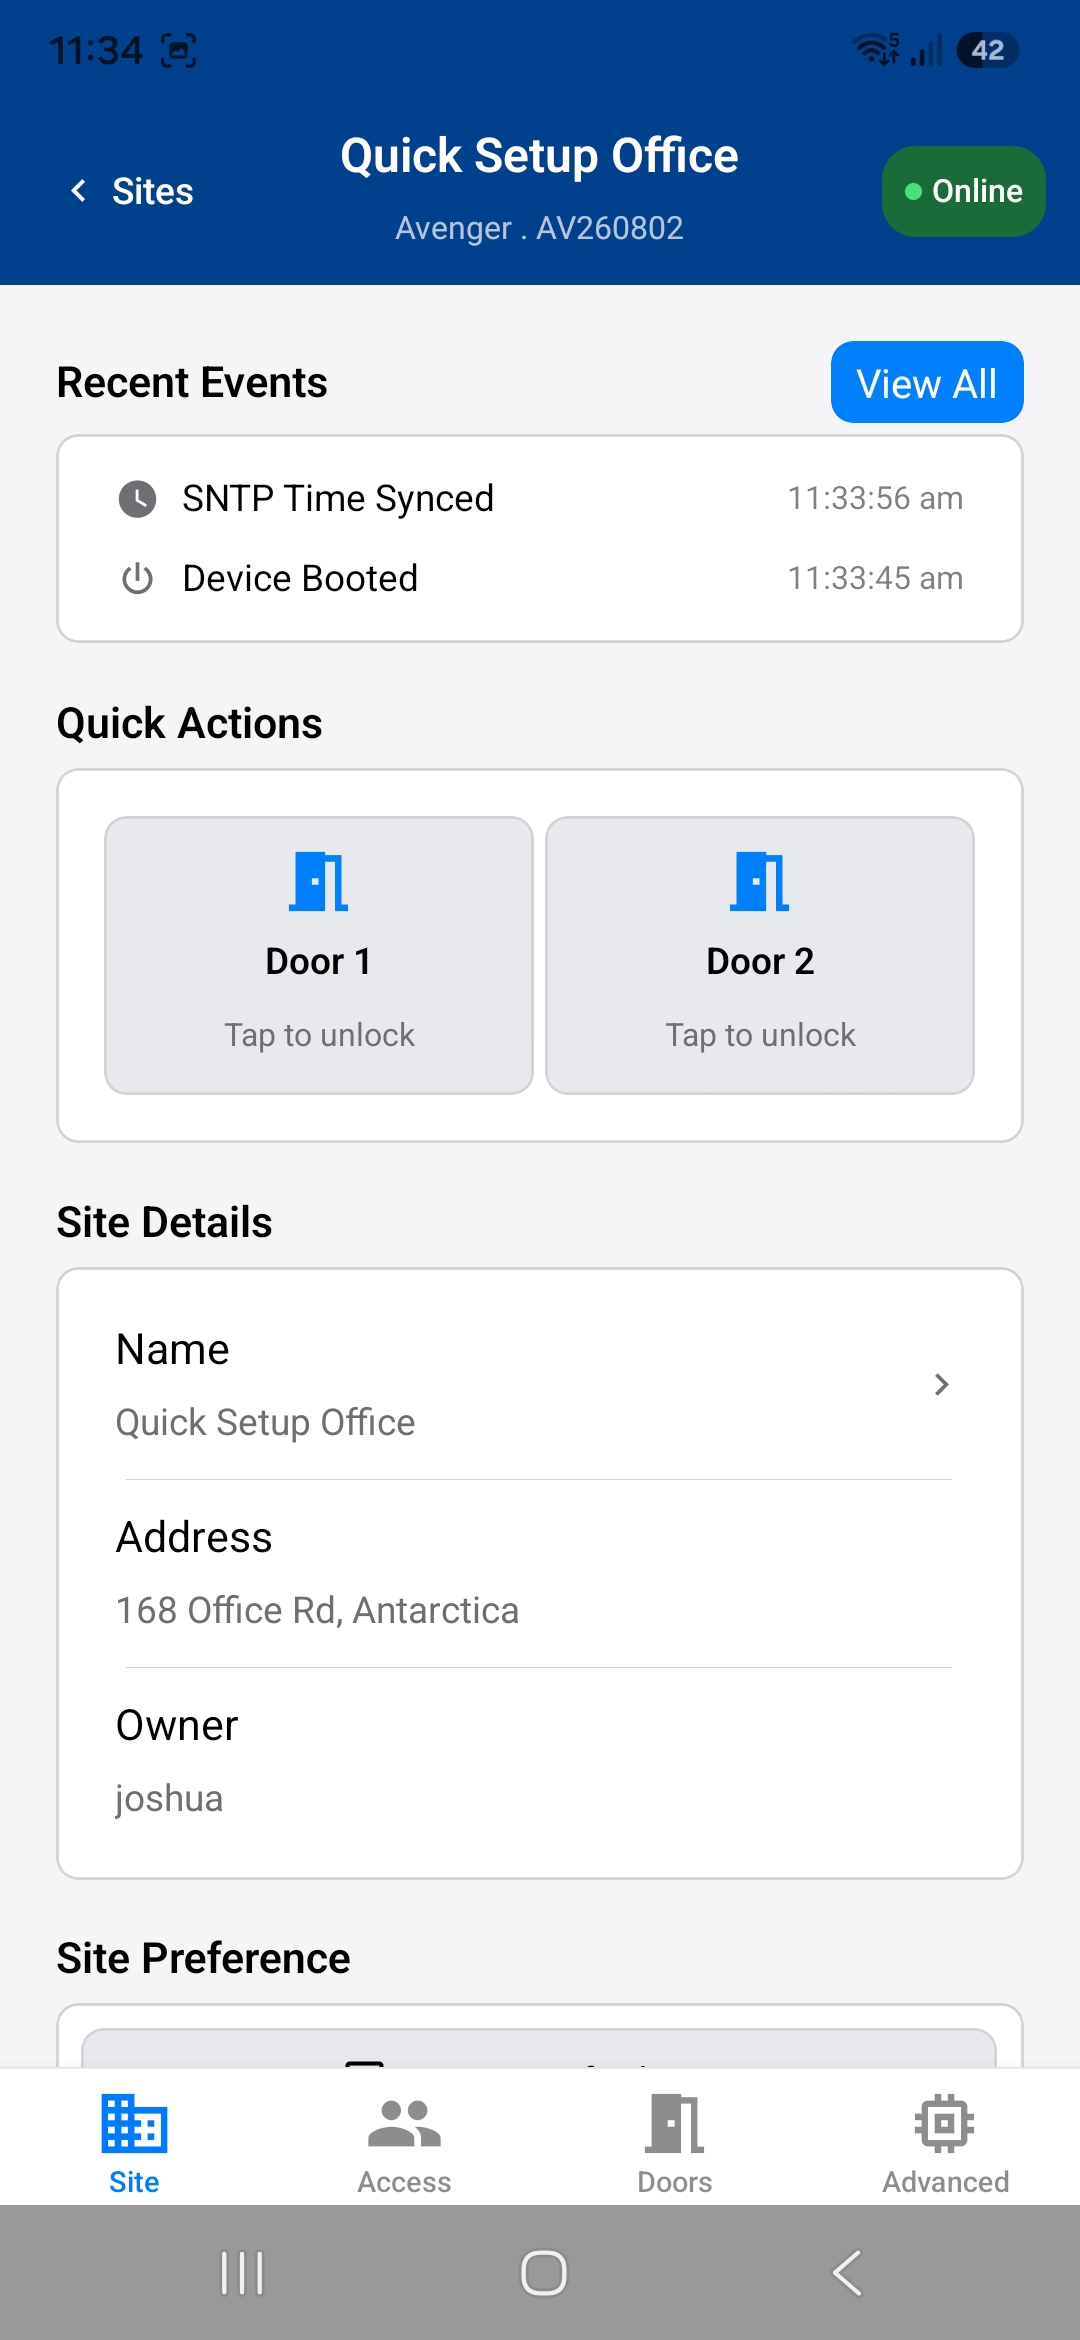
10. Configure the first door
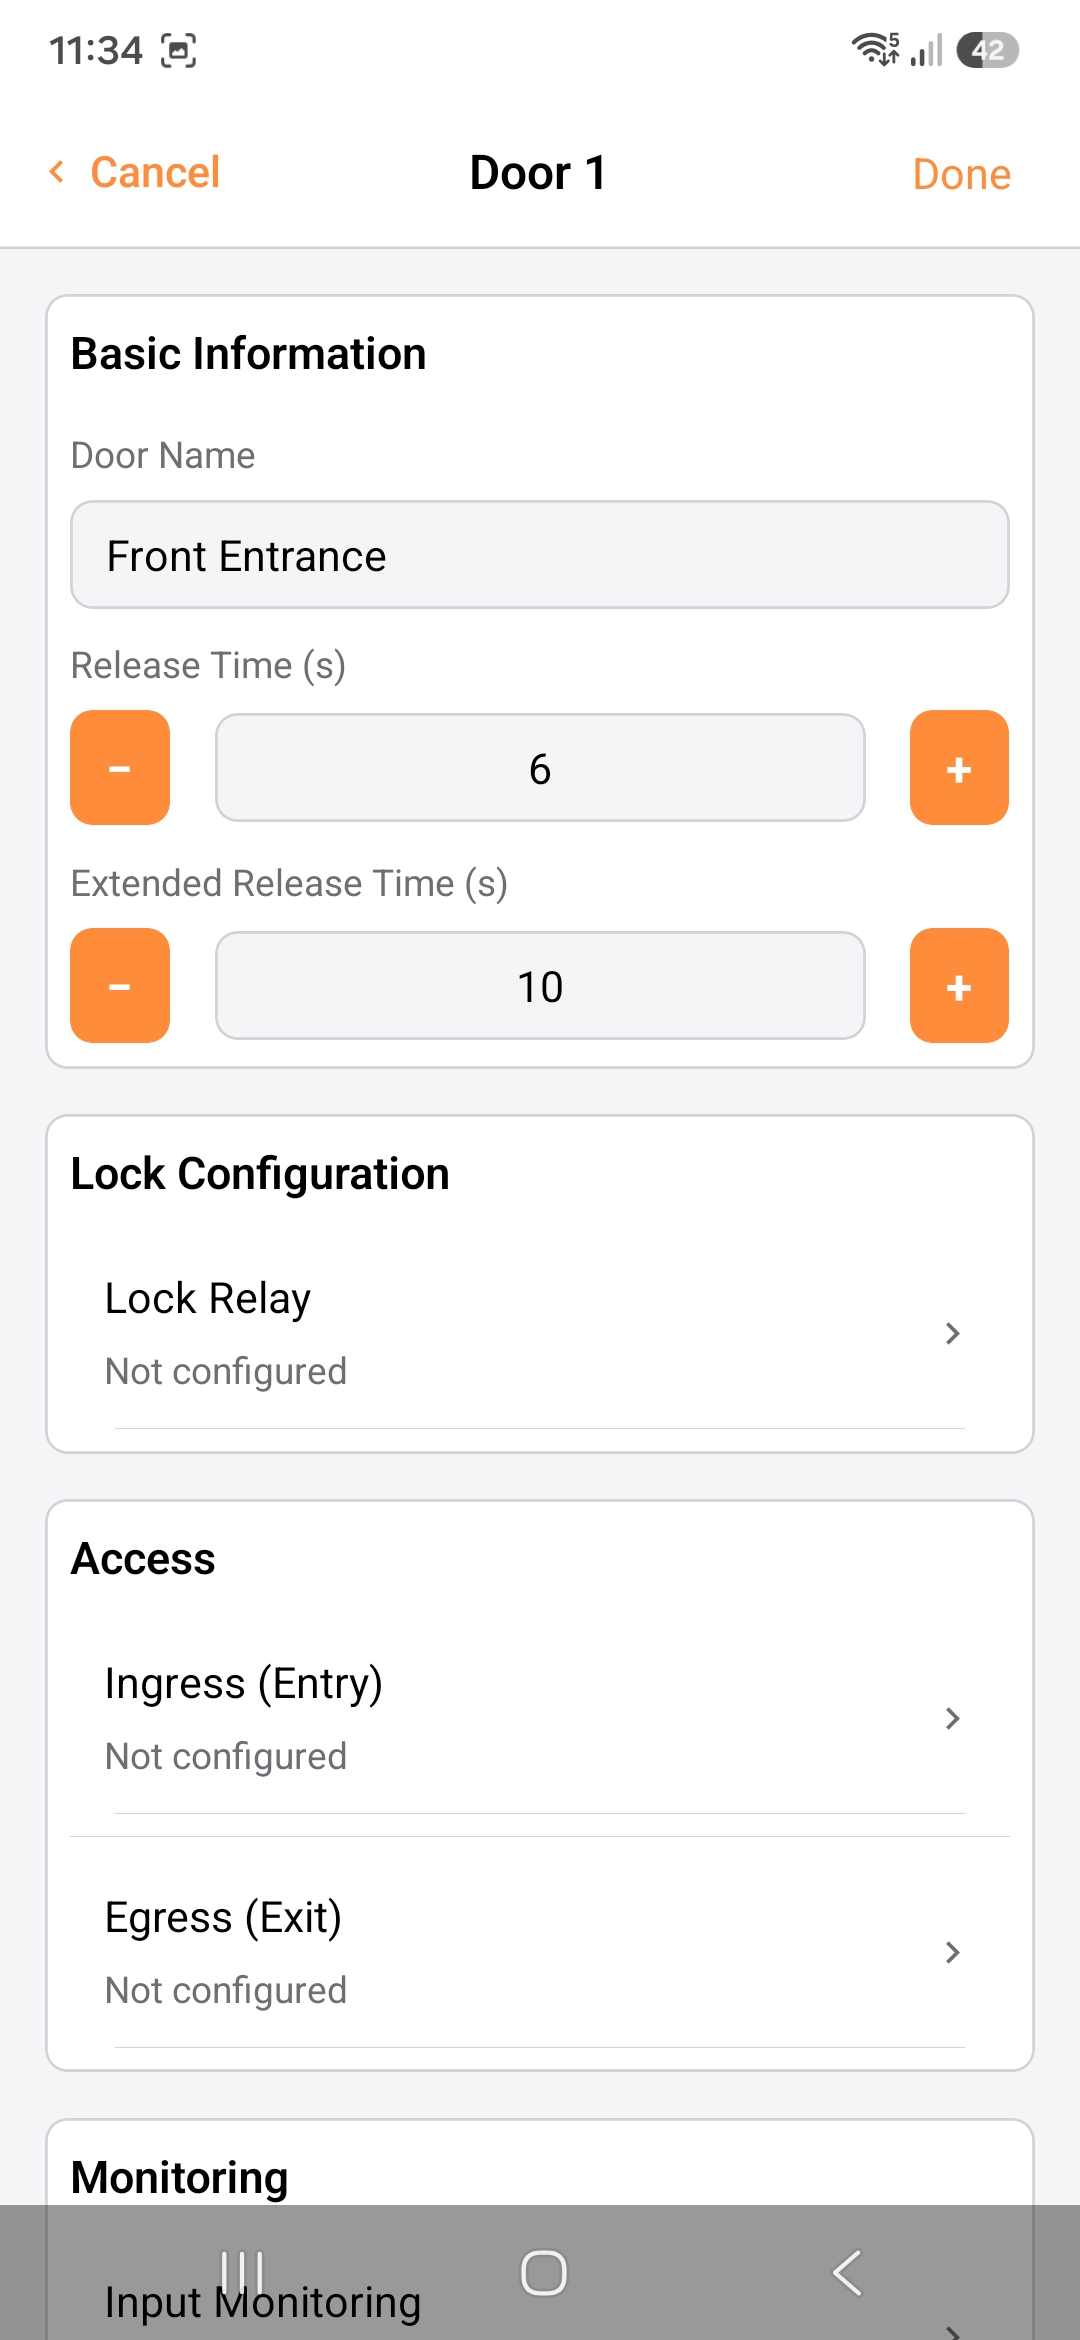
Section titled “10. Configure the first door”Enter a clear Door Name and set the normal and extended release times. Under Lock Relay, enable the relay and select the output wired to the lock, then select Save.
Under Ingress (Entry), enable the ingress reader and select the reader wired to the entry side of the door. Select Save, then select Done on the door screen.
Exit behavior and input monitoring can be added later if they are part of the installation.
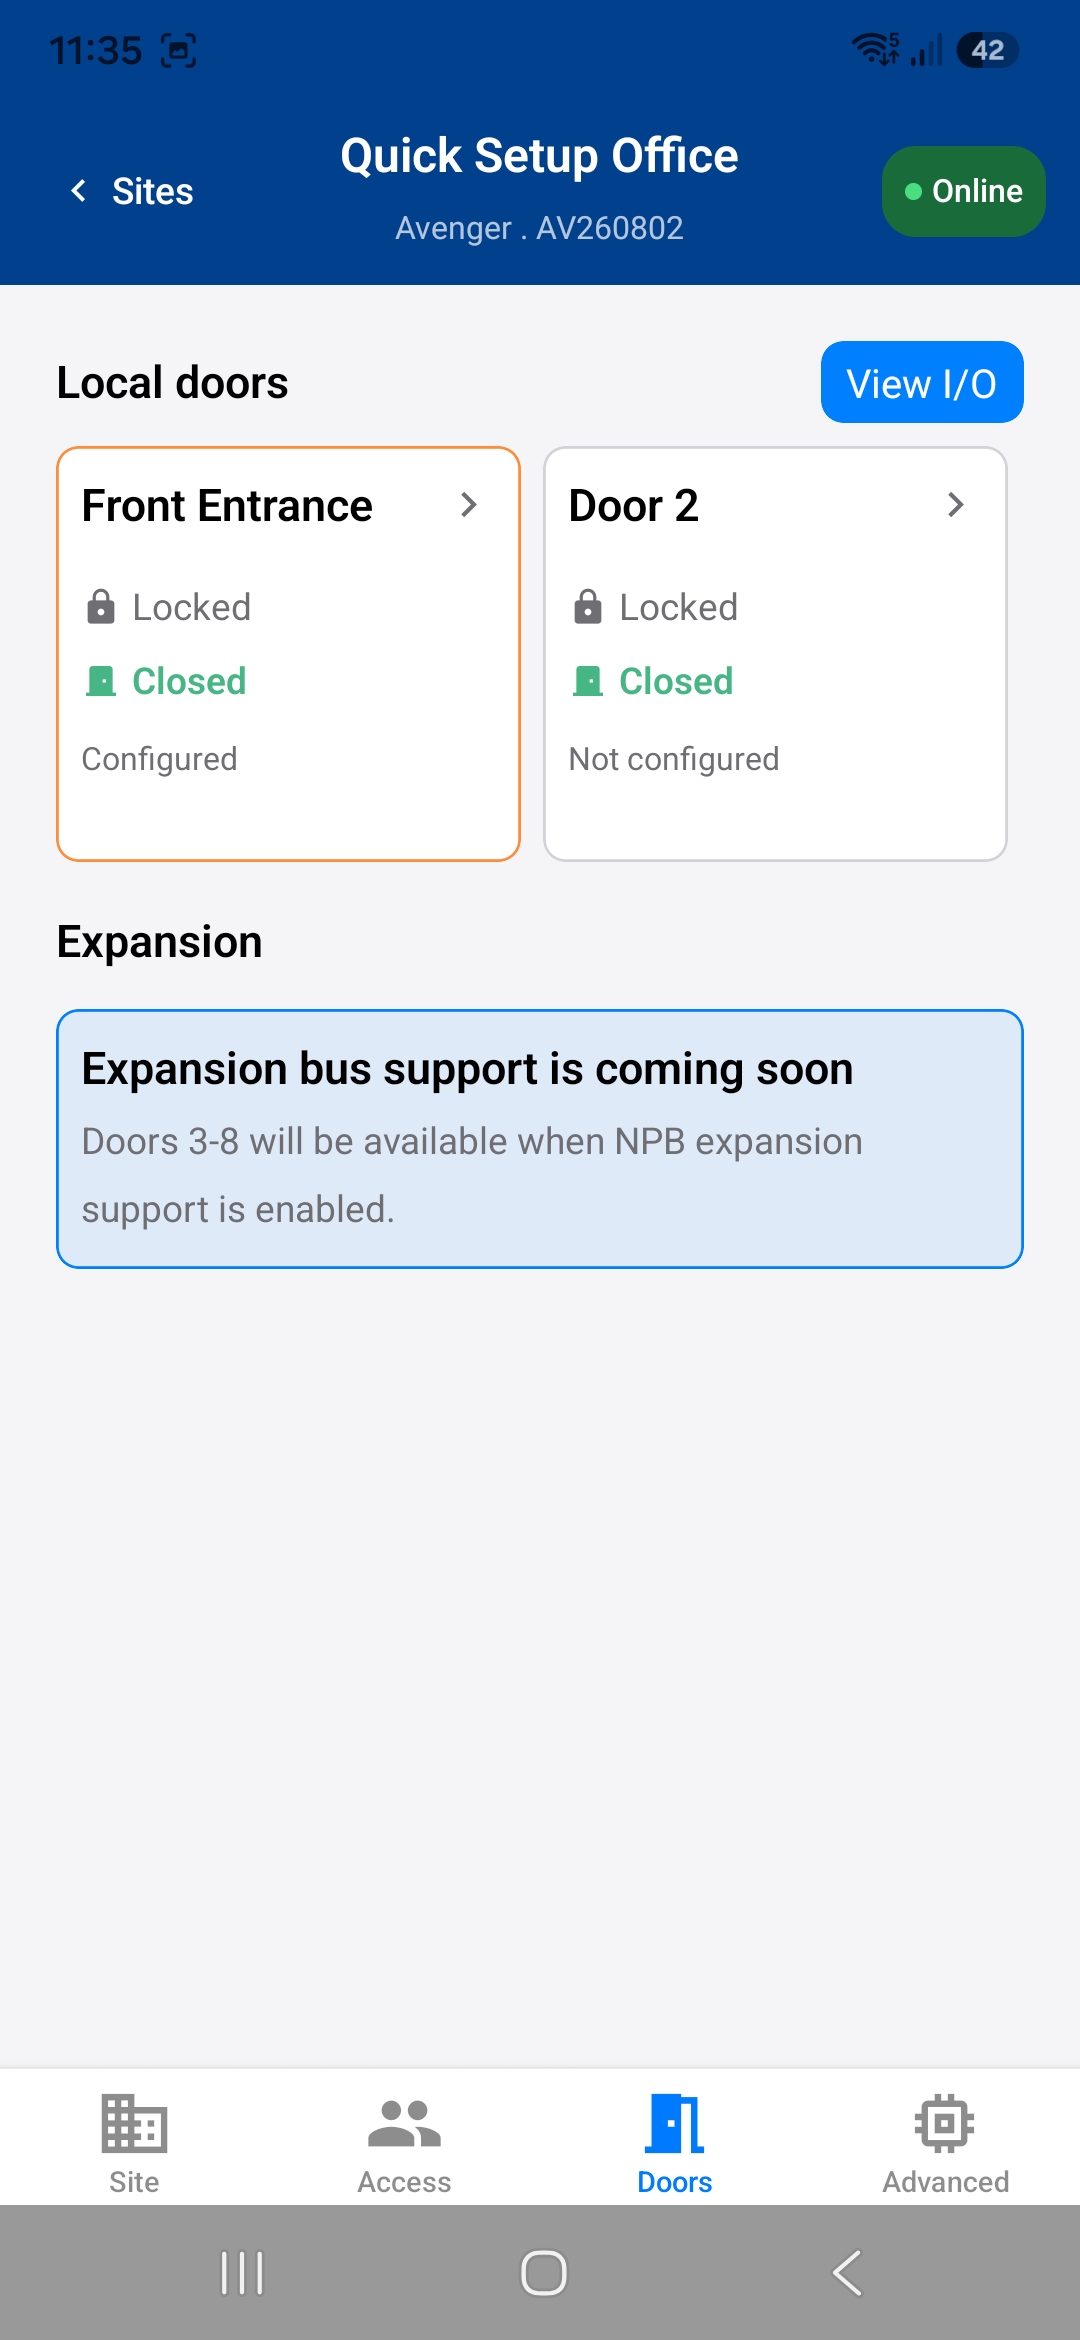
11. Confirm the door is configured
Section titled “11. Confirm the door is configured”Check that the door displays its new name and shows Configured.
Add a user with access
Section titled “Add a user with access”12. Create the first access user
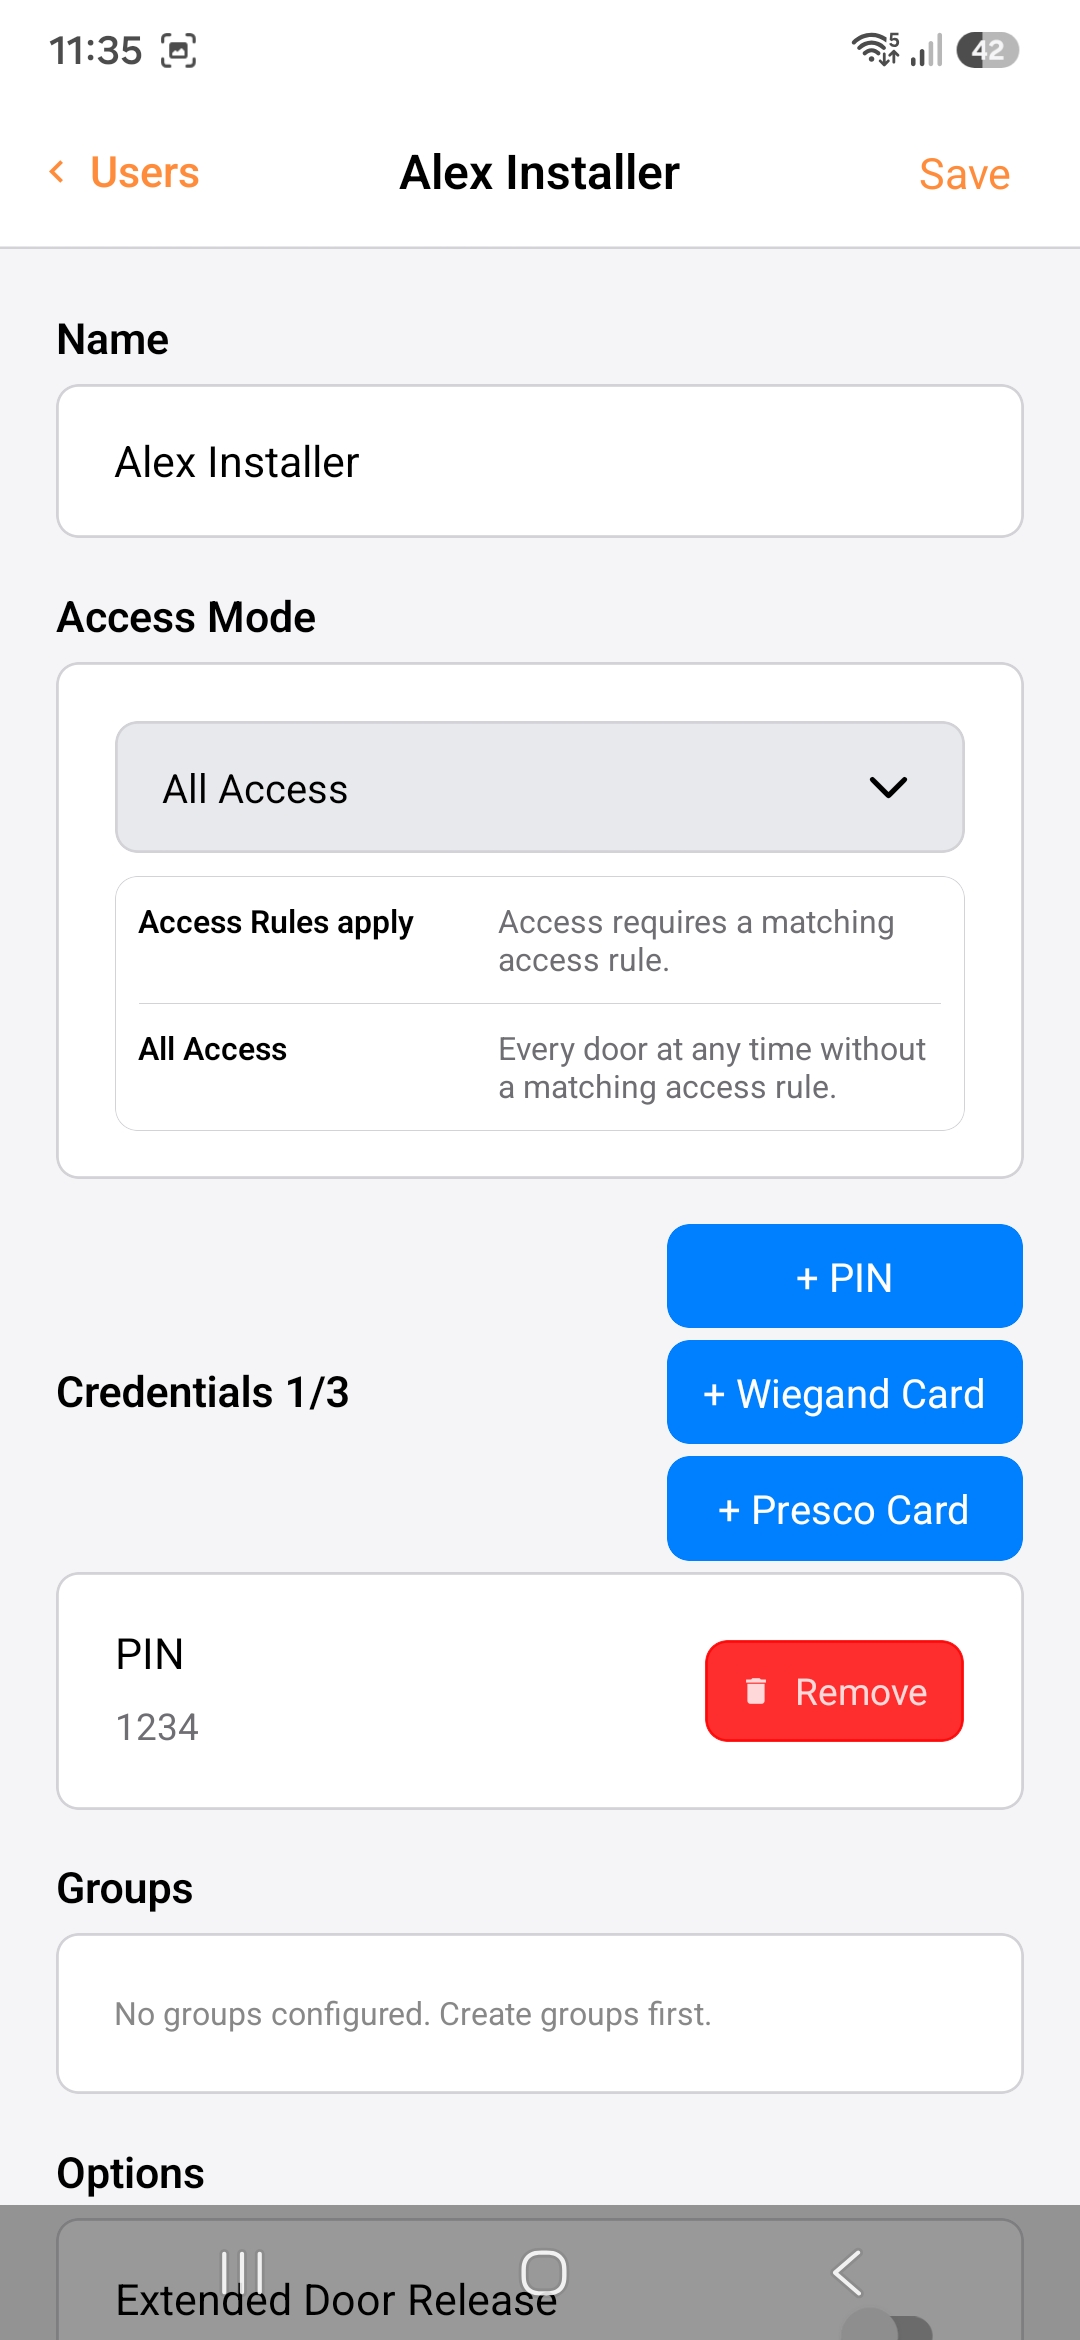
Section titled “12. Create the first access user”Select Access, open Users, then select + Add. Enter the person’s name.
For this initial setup, set Access Mode to All Access. Add a PIN, Wiegand Card or Presco Card, enter its value and select Confirm.
Select Save. The new user can now use that credential at every configured door at any time.
13. Test the credential
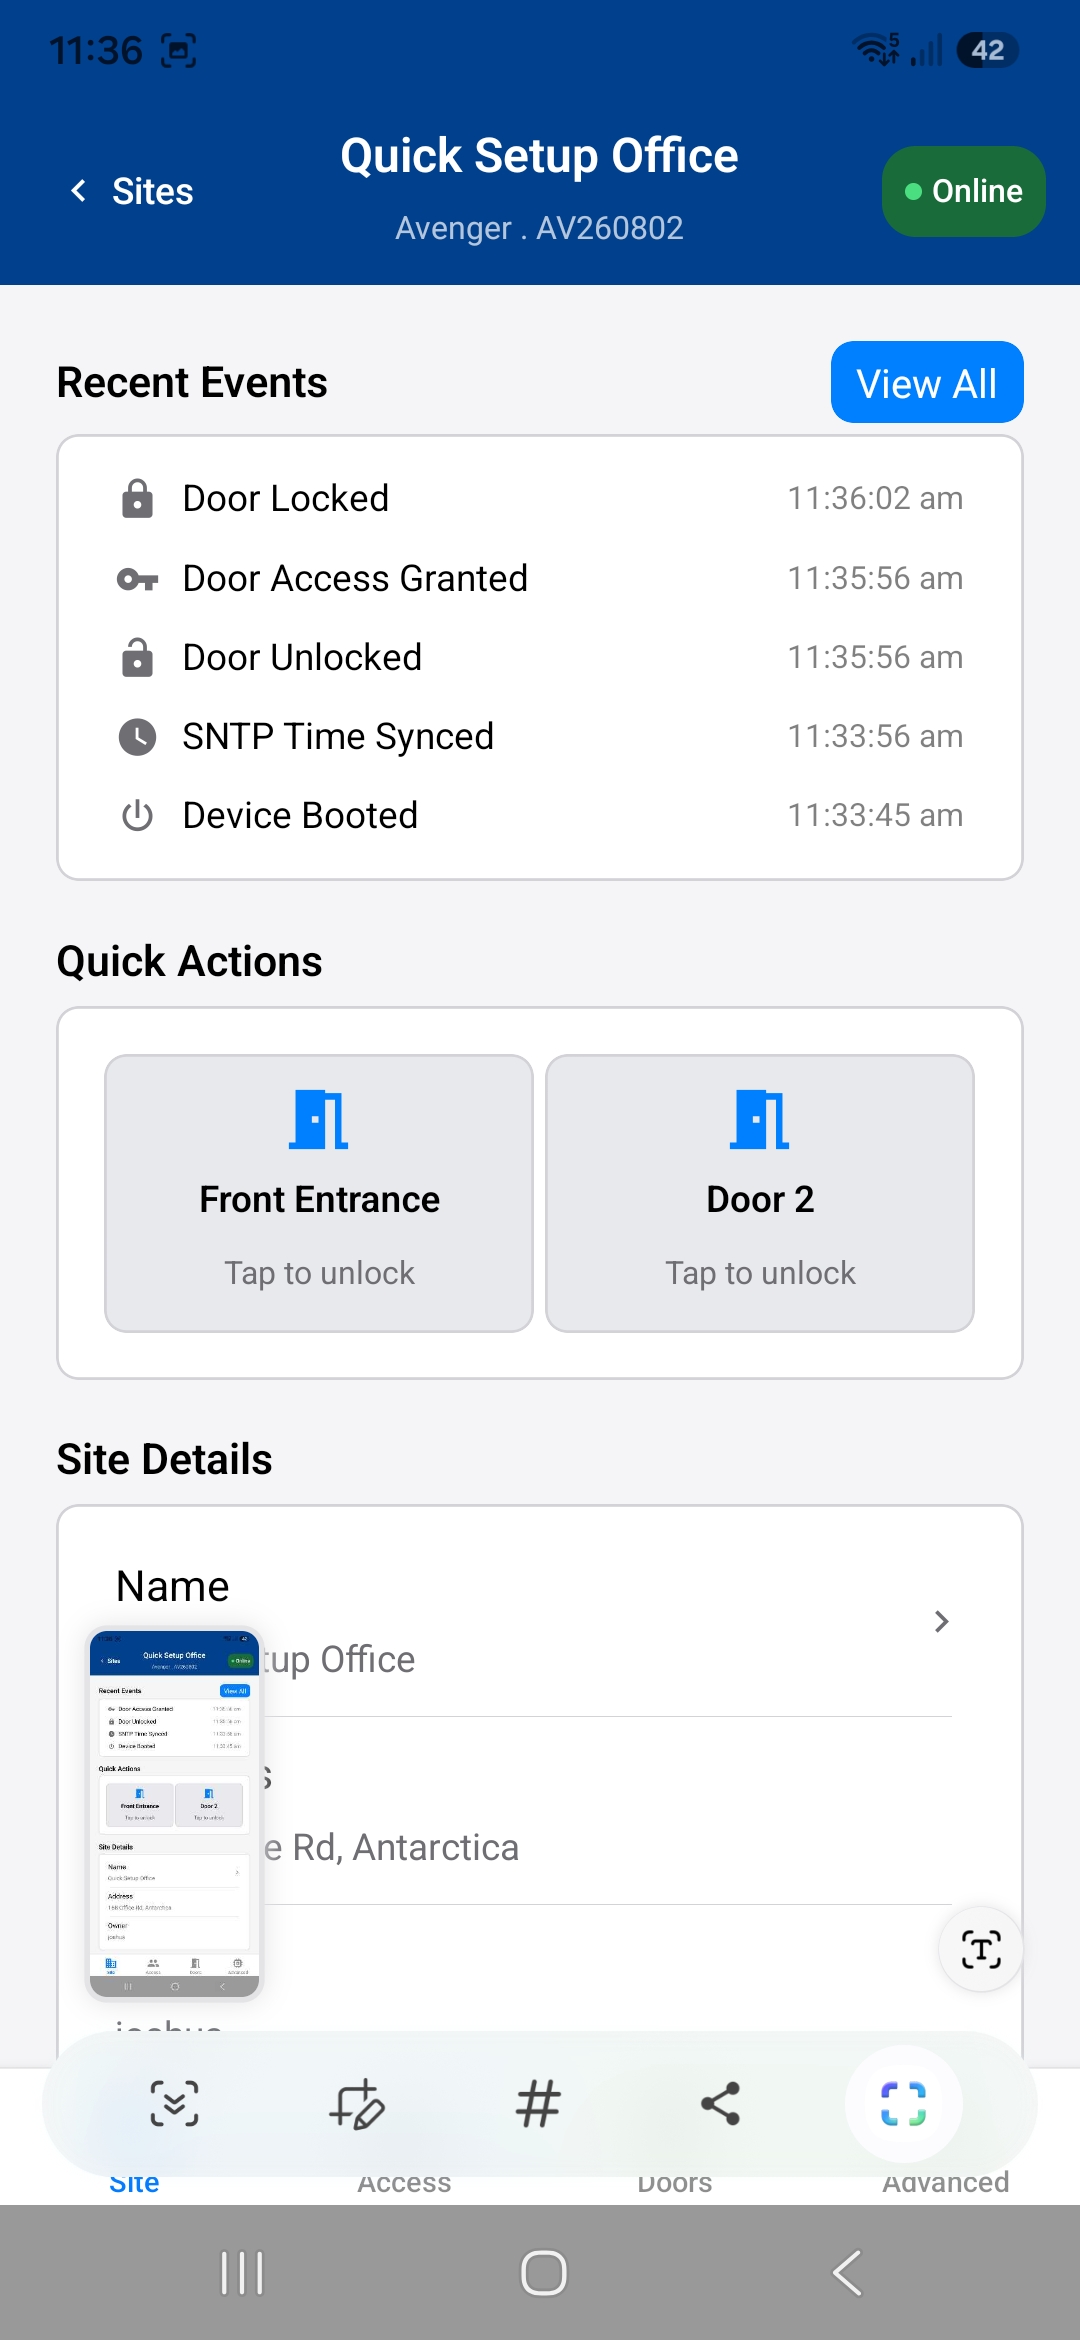
Section titled “13. Test the credential”Present the new credential at the configured reader. Confirm that the door unlocks and Door Access Granted appears under Recent Events.
If setup fails
Section titled “If setup fails”- No Avenger devices found: confirm the device is powered on, move closer and try scanning again.
- Wi-Fi test fails: confirm the selected network and password, then test the connection again.
- Device is not registered: contact NIDAC support at …
- Credential does not unlock the door: confirm the user has All Access, then verify the door’s reader and lock relay assignments.